2025. 2. 20. 07:43ㆍ같이 공부합시다 - Flutter/Dart & Flutter 기초부터 실전까지
📌 주제
✅ Dart의 비동기 프로그래밍 이해하기
✅ Future, async/await 활용법
✅ Flutter에서 API 데이터를 비동기로 가져오는 방법
1️⃣ 비동기 프로그래밍 개념
📌 비동기(Asynchronous)란?
- 동기 : 일반적인 코드 실행 흐름
- 비동기 : 시간이 오래 걸리는 작업, 블로킹(blocking) 없이 실행하는 방식.
- 예시) 네트워크 요청(API 호출), 파일 읽기, 데이터베이스 쿼리, 타이머 등
📌 Dart에서 비동기 작업을 처리하는 방법
1️⃣ Future (미래의 값, 비동기 작업 결과)
2️⃣ async / await (비동기 코드를 동기적으로 작성할 수 있도록 도와줌)
3️⃣ Stream (연속적인 데이터 흐름을 처리, 예: 실시간 채팅, 센서 데이터)
2️⃣ Future 기본 개념
📌 Future는 "미래에 완료될 값"을 나타내는 객체
- Future는 즉시 실행되지만, 결과를 받기까지 시간이 걸림.
- then(), catchError(), whenComplete()를 활용하여 결과 처리 가능.
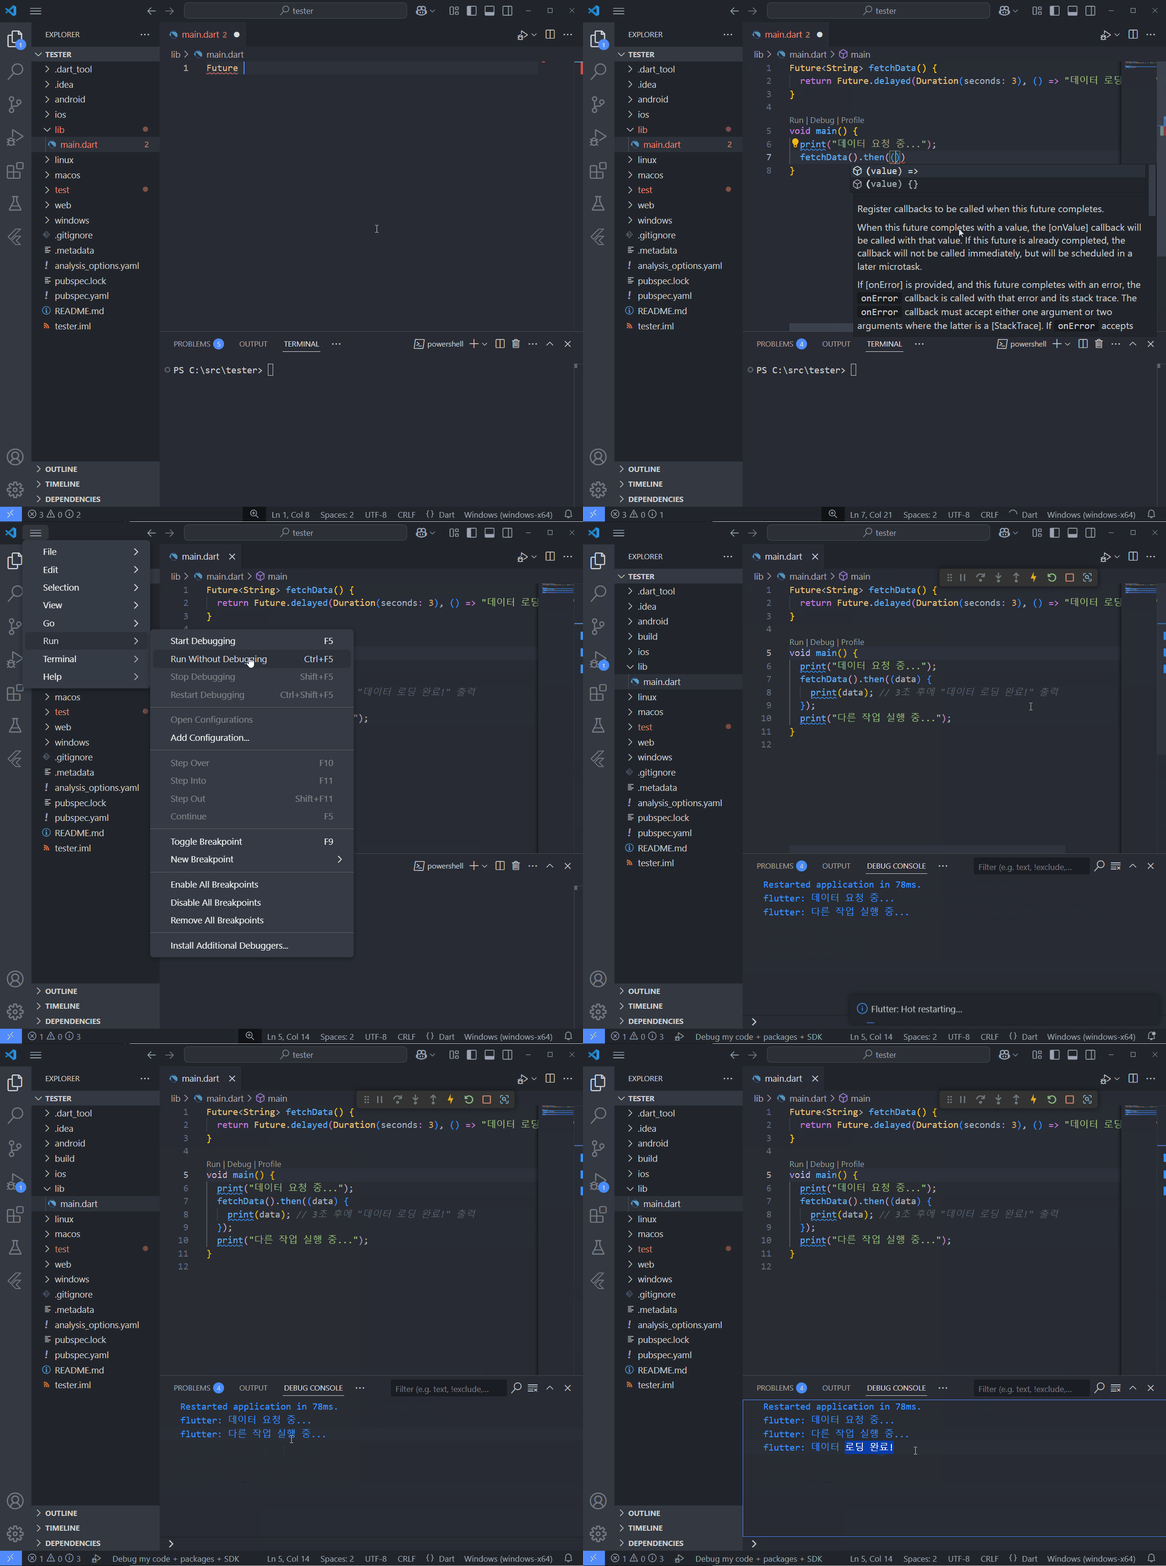
🔹 Future 예제 1: 3초 후에 데이터 반환
Future<String> fetchData() {
  return Future.delayed(Duration(seconds: 3), () => "데이터 로딩 완료!");
}

void main() {
  print("데이터 요청 중...");
  fetchData().then((data) {
    print(data); // 3초 후에 "데이터 로딩 완료!" 출력
  });
  print("다른 작업 실행 중...");
}
출력 결과:
데이터 요청 중...
다른 작업 실행 중...
(3초 후)
데이터 로딩 완료!
✔ Future.delayed() 를 사용하여 3초 후 값을 반환하는 비동기 함수
✔ then()을 사용하여 Future 완료 후 결과값을 받아 처리
[ 테스트 ]
3️⃣ async/await을 활용한 Future 처리
📌 async/await을 사용하면 비동기 코드를 동기 코드처럼 작성 가능
📌 await 키워드는 Future가 완료될 때까지 기다림 (비동기 실행을 동기처럼 표현 가능)
🔹 async/await 예제 2: Future 결과를 기다려서 실행
Future<String> fetchUser() async {
  await Future.delayed(Duration(seconds: 2)); // 2초 대기
  return "사용자 정보 로딩 완료!";
}

void main() async {
  print("데이터 요청 중...");
  String result = await fetchUser(); // await으로 Future 결과 기다림
  print(result);
  print("다른 작업 실행 중...");
}
출력 결과:
데이터 요청 중...
(2초 후)
사용자 정보 로딩 완료!
다른 작업 실행 중...
✔ async 함수 내부에서 await 사용 가능
✔ Future의 실행을 기다린 후, 다음 코드 실행
4️⃣ 예외 처리 (try-catch)
📌 비동기 작업에서 발생하는 오류를 처리하는 방법
📌 try-catch 또는 catchError()를 활용하여 예외(Exception)를 잡을 수 있음
🔹 try-catch를 활용한 비동기 예외 처리
Future<String> fetchUserData() async {
  await Future.delayed(Duration(seconds: 2));
  throw Exception("데이터 로딩 실패!"); // 강제로 예외 발생
}

void main() async {
  try {
	  print("데이터 요청중...");
    String data = await fetchUserData();
    print(data);
  } catch (e) {
    print("오류 발생: $e");
  } finally {
    print("비동기 작업 종료");
  }
}
출력 결과:
데이터 요청중...
오류 발생: Exception: 데이터 로딩 실패!
비동기 작업 종료
✔ try-catch를 활용하여 오류를 잡고 메시지 출력
✔ finally 블록을 사용하여 작업 종료 메시지 출력 (성공/실패와 상관없이 실행됨)
5️⃣ Flutter API 호출 , 데이터 로딩
1. http 패키지 설치 (필수)
flutter pub add http
2. API 요청 코드 작성
import 'dart:convert';
import 'package:http/http.dart' as http;

Future fetchPost() async {
  final url = Uri.parse("<https://jsonplaceholder.typicode.com/posts/1>");

  try {
    final response = await http.get(url);
    if (response.statusCode == 200) {
      final data = jsonDecode(response.body);
      print("✅ 게시글 제목: ${data['title']}");
      print("✅ 게시글 내용: ${data['body']}");
    } else {
      print("😱 API 요청 실패: ${response.statusCode}");
    }
  } catch (e) {
    print("❌ 오류 발생: $e");
  }
}

// ✅ 사용자 목록 가져오기
Future fetchUsers() async {
  final url = Uri.parse("<https://jsonplaceholder.typicode.com/users>");

  try {
    final response = await http.get(url);
    if (response.statusCode == 200) {
      List users = jsonDecode(response.body); // JSON 배열 변환
      print("✅ 총 사용자 수: ${users.length}");

      for (var user in users) {
        print("👤 사용자: ${user['name']} (📧 ${user['email']})");
      }
    } else {
      print("❌ 사용자 목록 불러오기 실패: ${response.statusCode}");
    }
  } catch (e) {
    print("❌ 오류 발생: $e");
  }
}

void main() async {
  print("🚀 데이터 요청 시작...");

  await fetchPost(); // 게시글 데이터 가져오기
  print("\\n📌 다른 작업 수행 중...\\n");

  await fetchUsers(); // 사용자 목록 가져오기
  print("\\n✅ 모든 데이터 로딩 완료!");
}
출력 결과:
🚀 데이터 요청 시작...
✅ 게시글 제목: sunt aut facere repellat provident occaecati excepturi optio reprehenderit
✅ 게시글 내용: quia et suscipit
suscipit recusandae consequuntur expedita et cum
reprehenderit molestiae ut ut quas totam
nostrum rerum est autem sunt rem eveniet architecto
✅ 총 사용자 수: 10
👤 사용자: Leanne Graham (📧 Sincere@april.biz)
👤 사용자: Ervin Howell (📧 Shanna@melissa.tv)
👤 사용자: Clementine Bauch (📧 Nathan@yesenia.net)
👤 사용자: Patricia Lebsack (📧 Julianne.OConner@kory.org)
👤 사용자: Chelsey Dietrich (📧 Lucio_Hettinger@annie.ca)
👤 사용자: Mrs. Dennis Schulist (📧 Karley_Dach@jasper.info)
👤 사용자: Kurtis Weissnat (📧 Telly.Hoeger@billy.biz)
👤 사용자: Nicholas Runolfsdottir V (📧 Sherwood@rosamond.me)
👤 사용자: Glenna Reichert (📧 Chaim_McDermott@dana.io)
👤 사용자: Clementina DuBuque (📧 Rey.Padberg@karina.biz)

✅ 모든 데이터 로딩 완료!
6️⃣ Future 여러 개 실행하기 (Future.wait())
📌 여러 개의 Future를 동시에 실행하고, 모두 완료되었을 때 한꺼번에 처리 가능
🔹 Future.wait() 예제
Future<String> fetchUserProfile() async {
  await Future.delayed(Duration(seconds: 2));
  return "사용자 프로필 데이터";
}

Future<String> fetchUserPosts() async {
  await Future.delayed(Duration(seconds: 3));
  return "사용자의 게시글 목록";
}

void main() async {
  print("데이터 요청 중...");

  // 두 개의 Future를 동시에 실행하고, 모든 작업 완료 후 결과 반환
  List<String> results = await Future.wait([
    fetchUserProfile(),
    fetchUserPosts(),
  ]);

  print("프로필: ${results[0]}");
  print("게시글: ${results[1]}");
}
출력 결과:
데이터 요청 중...
(약 3초 후)
프로필: 사용자 프로필 데이터
게시글: 사용자의 게시글 목록
✔ Future.wait()를 활용하여 여러 비동기 작업을 동시에 실행
✔ 가장 오래 걸리는 작업(3초)까지 기다린 후 결과 출력
7️⃣ Stream (연속적인 데이터 처리)
📌 Stream은 여러 개의 비동기 데이터를 순차적으로 받아올 때 사용
📌 async*, StreamController, listen() 등을 활용하여 데이터 흐름 관리 가능
🔹 Stream 기본 예제
Stream<int> numberStream() async* {
  for (int i = 1; i <= 5; i++) {
    await Future.delayed(Duration(seconds: 1)); // 1초마다 값 전송
    yield i;
  }
}

void main() {
  numberStream().listen((number) {
    print("새로운 값: $number");
  });
}
출력 결과:
새로운 값: 1
(1초 후)
새로운 값: 2
(1초 후)
새로운 값: 3
(1초 후)
새로운 값: 4
(1초 후)
새로운 값: 5
✔ async*와 yield를 사용하여 데이터를 순차적으로 응답
✔ listen()을 활용하여 Stream 데이터를 지속적으로 받아올 수 있음
📌 오늘의 실습 과제
✅ [실습 1] Future.delayed()를 활용하여 3초 후에 메시지 출력하는 함수 만들기
✅ [실습 2] async/await을 사용하여 API 데이터를 기다린 후 결과 출력하는 함수 만들기
✅ [실습 3] try-catch를 활용하여 오류 발생 시 예외 처리하는 코드 작성
✅ [실습 4] Future.wait()을 사용하여 2개의 비동기 작업을 동시에 실행하고 결과 출력
✅ [실습 5] Stream을 활용하여 1초마다 숫자를 출력하는 프로그램 작성